
Saw this pretty Granny Stripe variation on Pinterest…

Isn’t this a beautiful design? Wonderful variation of granny squares.

This blanket caught my eye on Ravelry, you may need to join to view the information there (it is free to join, and Ravelry is a great resource if you aren’t already a member). If you prefer, go directly to DD Hines blog for the Good and Evil Granny square pattern.
Almost done, just need to weave in the ends for the gray border and multi-colored edging. It was too cold outside for me to want to take any photos out there (in the teens for the high and windy!), so I had to take them next to the sunny kitchen window. Not room enough for a full view.
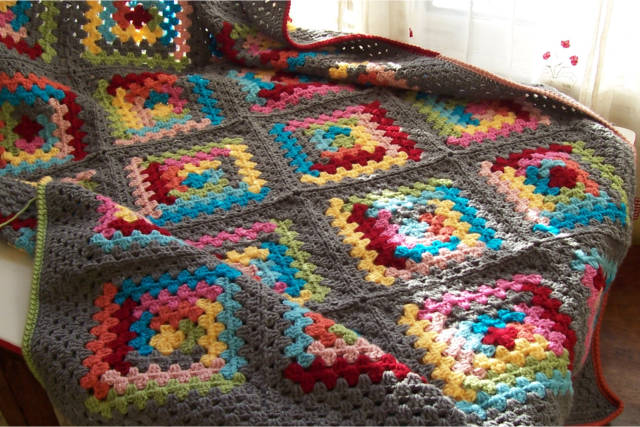
I made 20 of the log cabin granny squares, and then did 2 rounds in gray around each square, joining them join as you go in the last round. After joining the squares, I went around the whole blanket with 4 rounds of gray. Then I did 1 round in gray of single crochet, crocheting into the chains on each corner space, with 3 sc in the center chain (not in the chain 3 space, in the individual chain stitches).
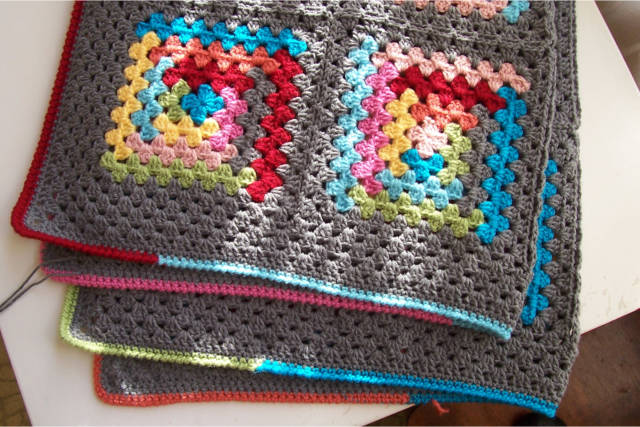
Then I did 1 sc round changing colors as I went so I had some of each color. I didn’t end off when I changed colors, which was a bit of a pain to have all those attached, but I could pick them back up when I did my final round of reverse single crochet (also called crab stitch). I like the kind of edge that stitch makes, it looks nice and finished. Here is a closer look at the edging (front and back)…

Here is a quick tutorial on how I am going about my Log Cabin squares, it is just a variation of a typical granny square (please let me know if you see any mistakes in the directions)…
Update (and update corrected): post with pics of the finished Gray Area Log Cabin Blanket which shows what I did with the border, for an estimate of the yarn used, go to the Log Cabin Blanket post.
Start with a sliding ring, and make a 1 round granny square. To do that, in the sliding ring you ch3 (counts as 1st dc) 2dc in the ring, [ch3, 3dc in the ring]3 times.

End with a ch3, tighten the loop, slpst into the top of the first ch3. End off.
I like making blankets in the winter, once they get large enough they help keep you warm while you work on them! I had been thinking of doing a log cabin motif for quite a while, and I had bought more yarn than I needed for the baby blanket I made for my granddaughter. Perfect excuse to make a colorful blanket for myself, so what if it doesn’t match my living room, can’t let all that yarn go to waste!
Update: wanted to note how much yarn. Had less than one ball of each color. 2 balls of red (just barely over 1 ball) and 4 balls of the gray.

I have also been itching to make a blanket with gray, I really like how colors look with gray and I think it makes the colors look more grown up. I also added some cranberry, I really like red!
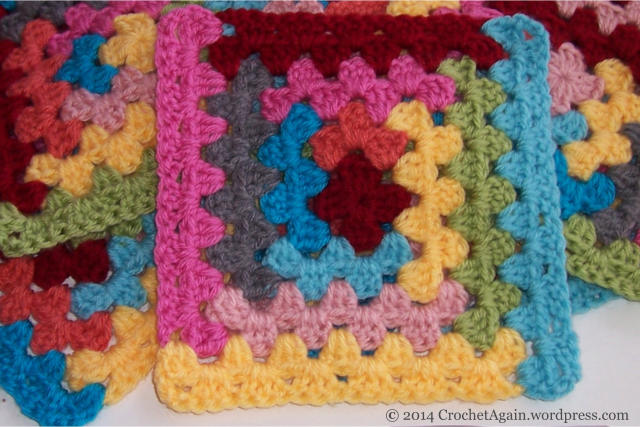
Here is my log cabin motif…(I forgot to include the darker blue in the yarn picture, at least it is in this one). I haven’t made a diagram for this one yet.

I was thinking of doing variations of the log cabin, so it was a bit of a sampler blanket, but I didn’t end up liking the ones I tried. There wasn’t anything wrong with them, I just felt like it didn’t really add anything, the regular log cabin was good by itself. They are rather busy, so I think sticking to the one kind of motif is the right choice.
I am liking that they are square, but not square looking with just the stripes of color. I decided to put a little of the gray in each so it isn’t just in the background. I like the gray a lot, reminds me of soft, warm sweatshirts. Warm is something we have a lack of right now (went below zero Fahrenheit last night! brrrrr)
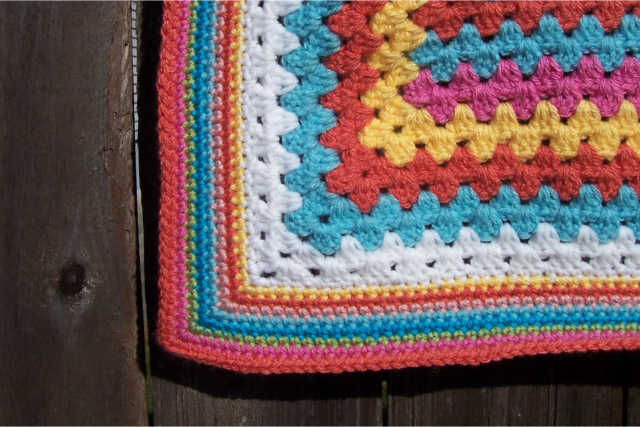
It’s done!! I decided to stick with simple for the border on my Hop, Skip and Jump baby blanket. Rounds of single crochet randomly in the colors of the blanket. I like how it looks and I like the different texture.

If I had to do it again (or had more time to re-do the border) I would do the border with a size or two larger hook than I used for the body of the blanket. I didn’t tighten my tension, but the border turned out denser than I would prefer, it would work best if a bit looser.

But, I was down to the wire! Baby shower is tomorrow and I just weaved in my last end this morning!
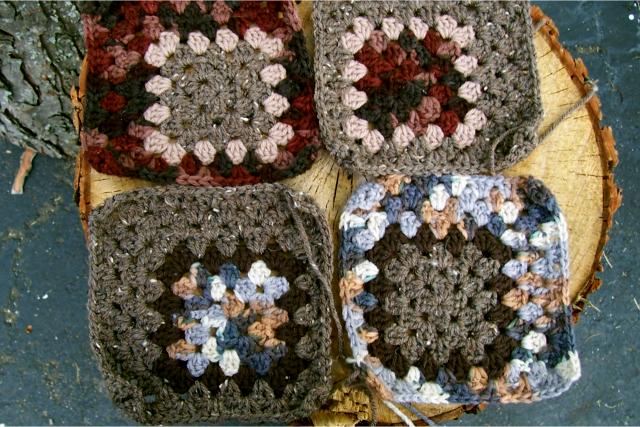
I haven’t misplaced my calendar. I fell in love with these earthy colors (see, I don’t only do bright colors ) and it all reminds me of November in New England. Frost on the edges of brown leaves as you crunch through them in the woods. Gray skies that smell a bit of snow. The greys and dark colors of the bare trees, the rustle of leaves as a squirrel scurries away, scolding me and Zip for intruding. Snuggling up with a cup of cinnamon coffee or hot chocolate.

I started this in the summer, when it was very hot and November weather seemed so far away. This post has been sitting since then, as whenever I could take photos it was rainy and cloudy. Today, it was a bit cloudy but I took some photos just the same.
I am not sure how I will arrange these off centered granny squares, but I really like them. I wanted a quilt-y look with the hombre yarns being the patterned fabric.
These squares were made like the Mitered Granny Square, with a larger center square with a different color border, only 2 ‘half rounds’ that make the miter part, and then two rounds for the final border.

I can smell the leaves just looking at them.
Well, I think it is better : ) As I said before, in my other Granny Rectangle post (I think this one is better), I have always been unsatisfied with how the center of granny rectangles line up in the middle, instead of alternating like it does in the rest of the fabric. It seems weaker and is not as pleasing to me, I just don’t like it : ) Don’t know why I didn’t do it this way the first time I got the idea, but at least I thought of it now.

Granny Rectangle Dog Mat (has a longer starting center)
Granny Rectangle Throw
2/9/17: I have a new post A Better Granny Rectangle Revisited. I have made some tweaks to how I do them since I first posted this and thought it deserved a new post. I include another version for doing them with 3dc, ch1.
1/17/17: I have added a Granny Rectangle V2.0 diagram (at the end of this article). This one has ch2 corners and ch1 in between the 3dc’s, to show that version of granny squares.
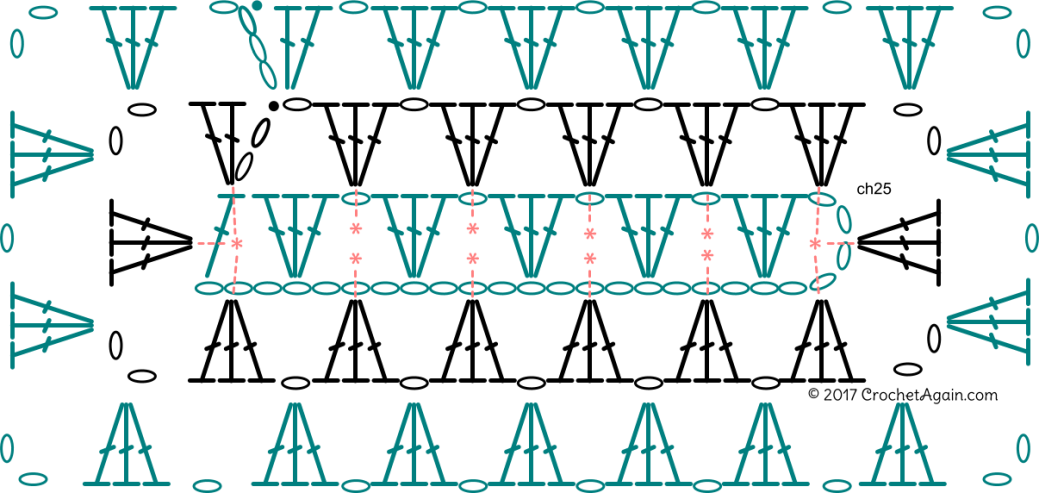
2/25/16: I have added another diagram that shows another round added so you can see how I continue on in the same color, it is near the end of the article.
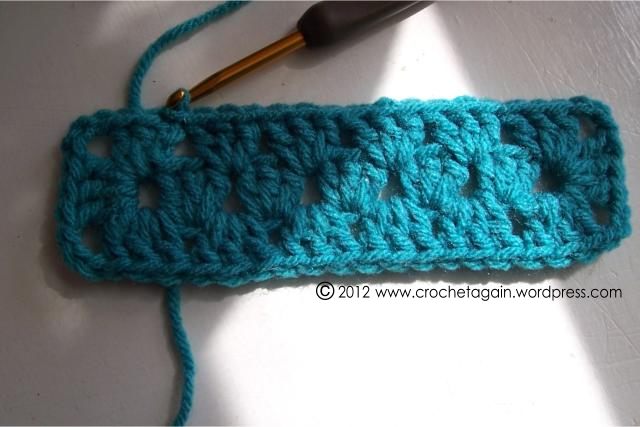
For the size I did in the example:
Ch 22 Ch 21 (corrected 8-24-13)
In the 6th chain from the hook, 3dc.
Skip 2 stitches, 3dc in same stitch.
Continue across, skipping 2 and doing 3dc in the same stitch. When you reach the last ch, 1dc. Ch3 (counts as a dc)

In the space on the end created by the dc and foundation ch; 2dc, ch3, 3dc, ch3, 3dc. 2 corners on the end made.

3dc in each space between across…

At the next end; in the ch 5 space 3dc, ch3, 3dc, ch3, 3dc to make the corners on the other end.

Now, go across the other side, making 3dc in each space between…

Slpst into the top of the beginning ch3 and there you have it!

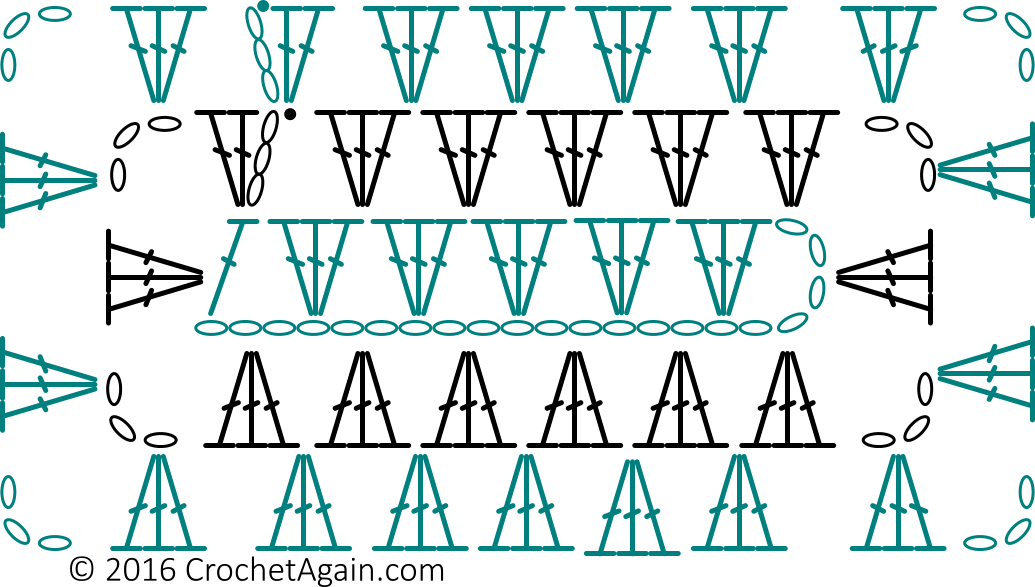
I find diagrams so helpful (pretend you don’t notice that I forgot the ending slpst in the diagram):

and another, to help with the maths of the repeats in case you want a different size…

Updated 2/25/16: Here is a diagram with another round of crochet added. To continue on, you would repeat as in the 2 rounds shown. Update: you can do ch2 in the corners if you find ch3’s are too much. Ch3 works fine for smaller projects, but ch2 would be better for larger items.
Update 1/17/17
This is A Better Granny Rectangle v2.0. The difference is ch2 on the corners and ch1 in between the 3dc’s. For those times you are using this to make a blanket and want to make your grannies with the ch1 between clusters. To change the size, adjust by 4 ch’s.
I am feeling that the added space in the starting chain in this 2.0 version is too much, not working as neat and tidy as I would like. Looks like this will be evolving even more, stay tuned!
1/21/17: A new version that is done with ch2 corners and a ch1 between the 3dc clusters, diagram for Mitered Granny Square 2.1.
Diagram for Modern Mitered Granny Square.
Link to Sliding ring tutorial, if you would like to start your squares the way I do.
Link to Join As You Go tutorial, if you would like to check out how I like to join granny squares.
These are the directions for the blanket I first showed in the Crochet in Progress post, here is a better photo (the colors look a bit washed out, the sun was bright):
![]()

And a closer look, remember it is posed on a chair, instead of lying flat so the squares look less than square. Continue reading “Mitered Granny Square”
