
Almost done, just need to weave in the ends for the gray border and multi-colored edging. It was too cold outside for me to want to take any photos out there (in the teens for the high and windy!), so I had to take them next to the sunny kitchen window. Not room enough for a full view.
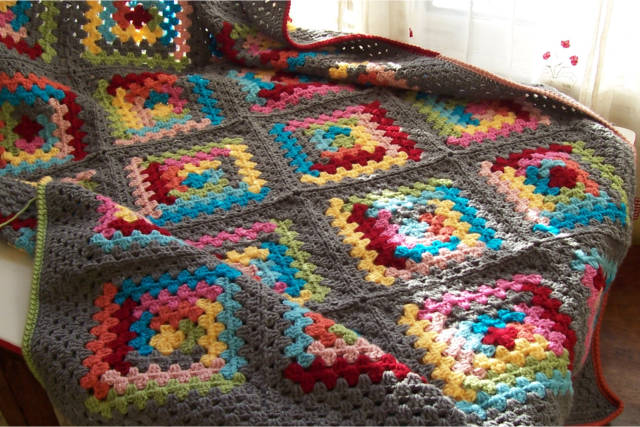
I made 20 of the log cabin granny squares, and then did 2 rounds in gray around each square, joining them join as you go in the last round. After joining the squares, I went around the whole blanket with 4 rounds of gray. Then I did 1 round in gray of single crochet, crocheting into the chains on each corner space, with 3 sc in the center chain (not in the chain 3 space, in the individual chain stitches).
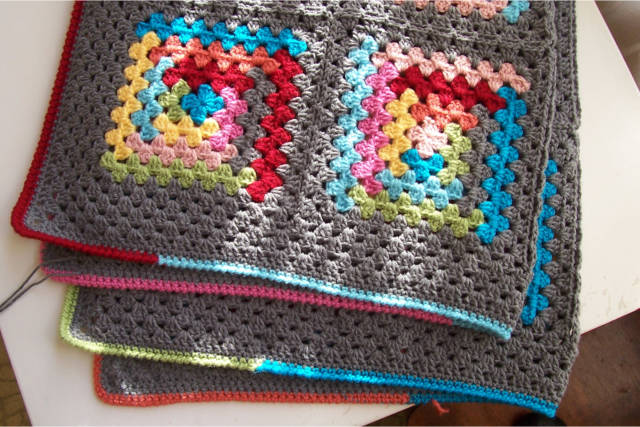
Then I did 1 sc round changing colors as I went so I had some of each color. I didn’t end off when I changed colors, which was a bit of a pain to have all those attached, but I could pick them back up when I did my final round of reverse single crochet (also called crab stitch). I like the kind of edge that stitch makes, it looks nice and finished. Here is a closer look at the edging (front and back)…


