
Over the years I have made some tweaks and changes when I use A Better Granny Rectangle. I thought it was time to share those changes in a new post. There are 2 versions included here.
Continue reading “A Better Granny Rectangle Revisited”
Step by step directions on how to do specific crochet techniques.
Over the years I have made some tweaks and changes when I use A Better Granny Rectangle. I thought it was time to share those changes in a new post. There are 2 versions included here.
Continue reading “A Better Granny Rectangle Revisited”I have made all my Log Cabin squares and am now starting to join them together so I decided to do a quick tutorial on my favorite way of joining granny squares (of course, it took much more time than I had hoped!). I am hoping to be clear and keep it simple, as it really isn’t that complicated, but it is often easy to make things sound more complicated than they are.
My squares are going to be bordered with two rounds of gray, and I held off on that until I was ready to start joining, so the first thing to do is complete the border on the first square in order to have one to join to. The rest I will join as I am doing the second (last) round of the gray border. (The photos show more than that joined together already). To help make it easier to see, I am doing the last round on this demonstration one in pink instead of gray.
I begin the joining in the corner, so crochet your last round up to the corner ch3 space, 3dc in the ch3 space as usual and then ch2 (I normally ch3 for each corner, this is one less ch, my attaching stitch will count as the 3rd).

Now you are going to sc into the ch3 corner space of the square you are joining to. Make sure you have the wrong sides together (in other words, the right sides are outward and the wrong sides are inward). Once you have attached to the other square with the sc, continue on crocheting 3dc in the corner of the square you are crocheting the border of. Continue reading “Join As You Go”

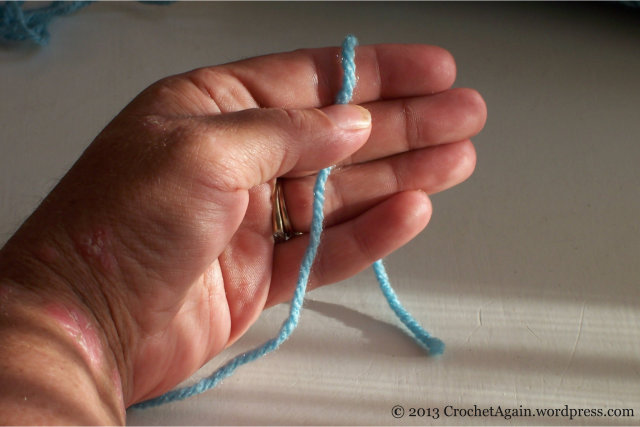
Some have asked for directions on how to do a sliding loop, perhaps because I keep mentioning starting with one : ) There is more than one way to do these. I have tried several ways from various directions on the web and in books, and this is the one I like the best and find easiest to do. That’s just me, you may find a different way easier.
Here we go….

When I returned to crochet I was very excited to learn new techniques. One of my favorites was learning to attach a new color with a standing stitch, rather than a slip stitch and chaining (I don’t remember where I first saw it). Except I didn’t love that the slip knot was there at the top of the stitch.
After playing around with it for a while, I came up with this way to start off with a standing stitch without a slip knot and chains.
This shows attaching with a dc, you can do it with other stitches too. Start by draping your yarn over your hook, so the short end is in the back.

Wrap the yarn twice over, and hold it on the hook with your finger. These are more loops than you need to make your stitch, but I find it easier to keep them on if there are extra. Keep your finger on top of them to keep them on the hook.

Insert hook where you want to attach, and draw up a loop (it’s a bit ackward until you get used to it).

Now, this part takes a bit of practice, with your yarn hand (the one holding your work, not the hook) hold the tail end of the yarn on the hook to the back of the fabric. That holds the loops on the hook so you can use it and not have to keep your finger on top of the loops. Yarn over the hook like normal…

and draw through 2 loops like a normal dc.

Yarn over again, and pull through 2 more loops. Remember there is extra, don’t pull through more than you need for doing the dc normally (as you get the hang of this, you may not need to do an extra yo).

Now here is how it looks when you add more stitches…

The first stitch looks a bit smaller at the top, but it doesn’t have a stitch on both sides to come out of. The yarn stays in place well enough without the slipknot once you do another stitch, and even better once you weave in the end.
