
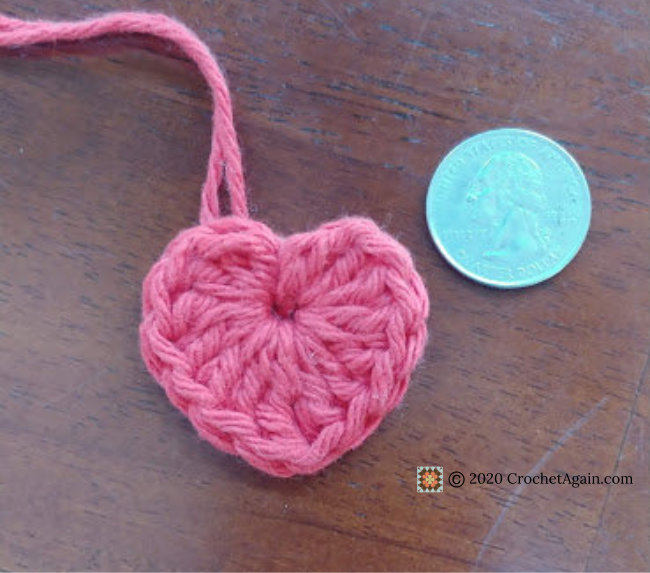
A teeny little heart to make your something a little extra special. This heart, or one of my granny square hearts could be a nice touch on many things. I like to add one to a corner of any blankets I make.

Crochet diagrams and patterns that didn’t quite fit in other categories.
A teeny little heart to make your something a little extra special. This heart, or one of my granny square hearts could be a nice touch on many things. I like to add one to a corner of any blankets I make.

A bag to tote my yarn for wip’s with plenty of color. A wide base, so skeins fit in comfortably – can’t have my yarn being uncomfortable! I used leftover yarn for lots of colorful stripes. The finished bag measures approximately 22″ w x 11″ h.
Every dog deserves a beautiful hand crocheted mat to lie on.


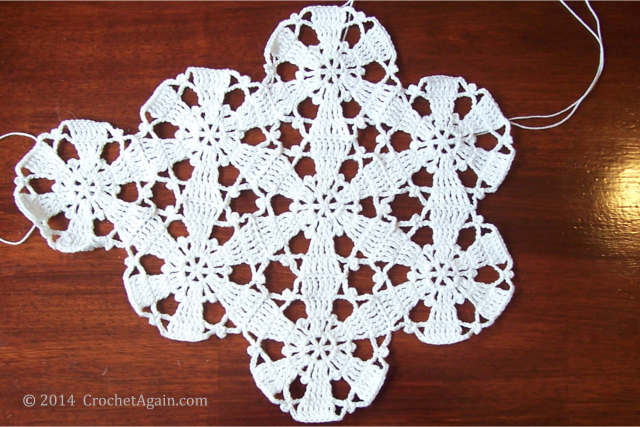
A small change in the pattern, and a little bit of progress. Despite the motifs being quite large, I still like them and think they will work on my table. Its bigger, bolder which makes it more modern (I tell myself : )
Not long after I first posted about the tablecloth, I kept fiddling with the pattern (I have been fiddling with this pattern, wanting to make it, for years!). I wasn’t satisfied with the way the first 2 rounds were coming out for me. Kept trying different things, but those weren’t any better. Continue reading “Olga’s Tablecloth Part 2, Revisions”

My grandmother made this small tablecloth years ago. I inherited it, and I love it. I wish it was in good condition, it is old and stained, the bright sun today makes it look better than it is, hiding its imperfections. I have been wanting to make a larger one for my dining room, but the thought of all those tiny motifs has kept me from attempting it.

A little closer, to give you a better sense of the overall pattern. I really like it, not too flowery or lacey.

Here is a closer look so you can get a peep at the details. Continue reading “Olga’s Tablecloth”
I was tinkering with making crochet stars earlier this summer and never got around to posting them.

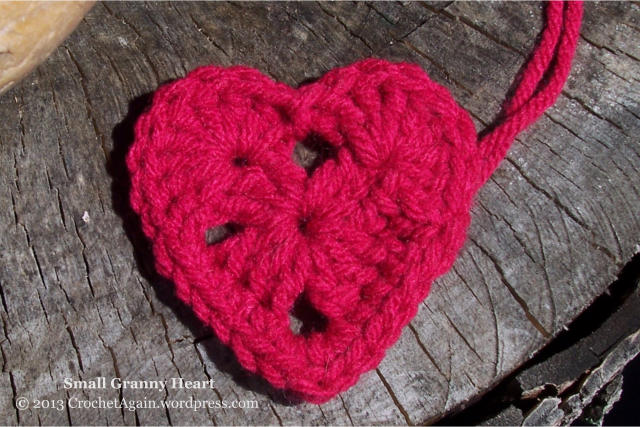
I got the idea to make a granny heart, I am not sure why, but once I did it wouldn’t leave my head. It has been percolating in there for a while. I figured I should just do it and get it out of there and unclutter my mind, and here is the result.
Update! Key to what each symbol means is now included in the diagram.


I have a weird obsession, um, I like things that are chickens, they amuse me and make me smile. I don’t know why. I also need something to keep me from burning my fingers when I cook. And so, I needed to make this chicken potholder. (I had to do it, I tell you!)


I got it in my head to make some crochet bunting. I tried quite a few different crochet triangles, there is a nice assortment of them on the interwebs. But none of them were just right for me. I wanted them to be a bit taller than wide, and granny was a must. Some scallop edge would be nice too. I think I am happy with these : )

Yes, yes, I do think I like them quite a bit. The colors in the photo aren’t quite right, they are red, white and aqua.

Here are the directions on how I made them, using the red, white and blue one as the example.
I used worsted weight acrylic yarn and a 4.5 mm hook.
Start with red, make a magic circle, draw up a loop and ch3 (counts as first dc here and everywhere : )
In the circle, 2dc, ch3
4dc, ch3
4dc, ch3, slpst to top of beginning ch3. End off. (1 group of 3dc, 2 groups of 4dc with 3 ch3 “corners” in between each. The 3dc side of the triangle will be the top)
Attach white with a dc or a slpst and ch3 in the corner that is to the right of the group of 3dc. 2dc in same space.
3dc, ch3, 4dc in next corner ch3 space.
4dc, ch3, 4dc in next corner ch3 space.
In the starting ch 3 corner, 4dc, ch3. Slpst to top of beginning stitch or ch3. End off.
Attach aqua to the same ch3 corner that you ended with. 2dc in same space.
3dc in the space between the 3dc group of the previous round.
3dc, ch3, 4dc in the next ch3 corner space.
4dc in the next space between.
4dc, ch3, 4dc in the next corner space.
4dc in the next space between.
In the starting ch3 corner, 4dc, ch3. Slpst to beginning. Do not end off.
Ch3.
3dc in each of the next 2 spaces between.
In the corner ch3 space, 3dc, ch3, 5dc.
In between the 2nd and 3rd dc of the next 4dc, sc.
5dc in next space between.
Sc in between 2nd and 3rd dc.
5dc in between again.
Sc between 2nd and 3rd again.
In the corner ch3 space, 9dc.
Sc in between the 2nd and 3rd dc.
Carry on like that, 5dc in between and sc between the 2nd and 3rd stitch.
In the beginning corner, 5dc, ch3, 2dc. Slpst to top of starting ch3. End off.
Here is a diagram to help out.

To Join the Triangles
With white, make a slip knot and ch8. Slptst to beginning.
Ch8 again.
3dc in right hand corner ch3 space of your first triangle.
ch12
3dc in the opposite ch3 corner space
ch6
3dc in the corner space of your next triangle.
ch12
3dc in opposite corner.
End with ch16, slpst in 8th ch from hook, end off.
Another diagram to help out, hope it is big enough to see clearly….

Love to hear about and see any that you make!

My table topper is almost finished, just need to do all the weaving in (I wish that was as easy as hiding them underneath for the photo : ) I really love how it came out. The colors are so cheerful, a bright spot for morning coffee.

Take a closer look…

I really like the simple, softly pointed edge. Come in and look a little closer…

If you know how to do corners on granny squares, then you already know how to do the edging! In the space between 3 dc, do the 3dc, ch3, 3dc that you would do for a corner. Sc inbetween the next 3dc space. And so on. You need an odd number of 3dc spaces to have it work out right. In the corner spaces, I did 4dc, ch3, 4dc to make them a bit bigger.
You can see some of the squares before the edging was added in this post.
