

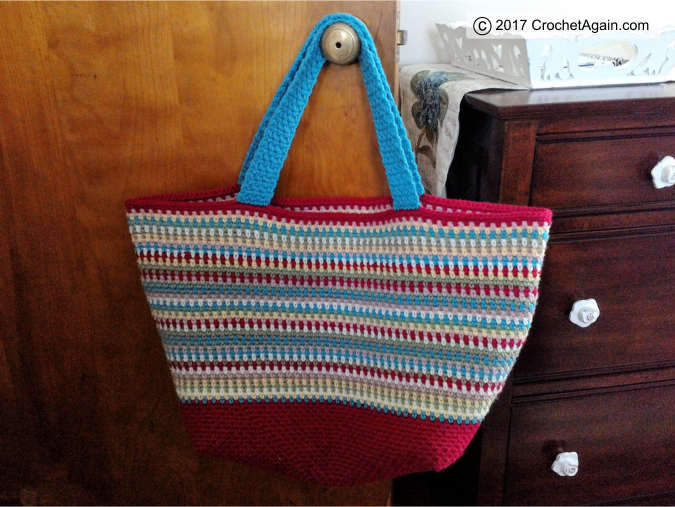
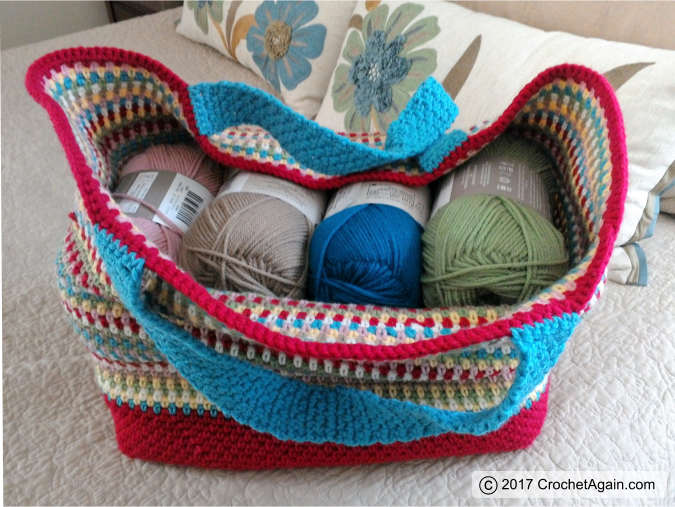
A bag to tote my yarn for wip’s with plenty of color. A wide base, so skeins fit in comfortably – can’t have my yarn being uncomfortable! I used leftover yarn for lots of colorful stripes. The finished bag measures approximately 22″ w x 11″ h.
Needed
G Hook
Stitch markers (you can use safety pins or pieces of yarn)
yarn needle
Yarn
Worsted weight yarn (4)
Loops and Threads Impeccable Cherry was used for the base, edging and optional pocket, and Aqua for the handles.
Assorted leftover worsted weight yarn for the stripes.

Stitches
chain, sc and moss stitch (also referred to as granite stitch, linen stitch and woven stitch)
is an easy stitch to do. It is sc, ch1. In each row or round, you sc in the ch1 spaces, ch1 and skip a stitch.
Colors
Cherry – 2 skeins – I needed a little more than the 1 skein for the base, stripes and edging. The optional inner pocket also uses cherry.
Cream
Yellow
Taupe
Rose
Fern
Aqua
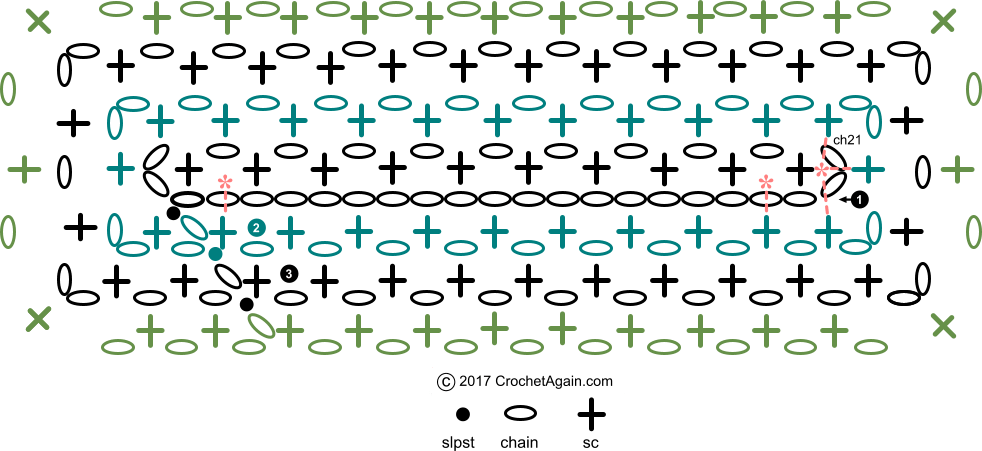
The Base
Foundation
With Cherry
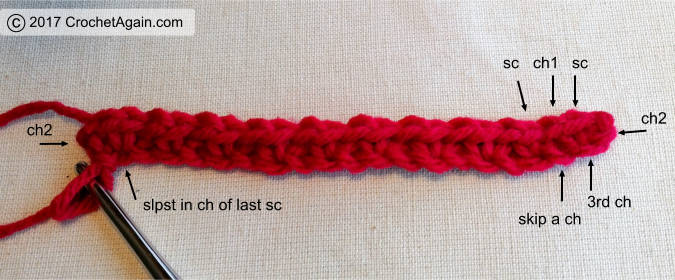
Ch 21
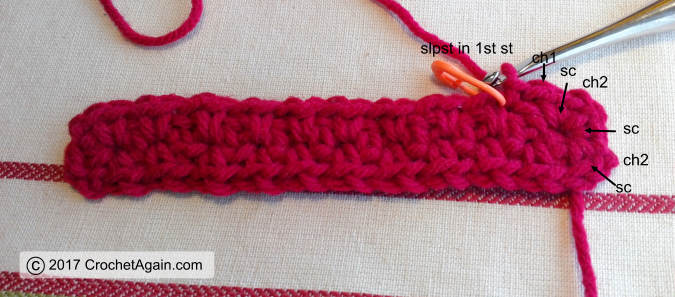
Sc, ch1 in 3rd ch from hook.
Skip 1 ch, sc, ch1 in the next.
Repeat across, sc in the last ch.
Ch2, slpst in the same chain as the last sc.
Do not end off.
This is a bit like A Better Granny Rectangle, except with sc instead.
Adjust the foundation by multiples of 2

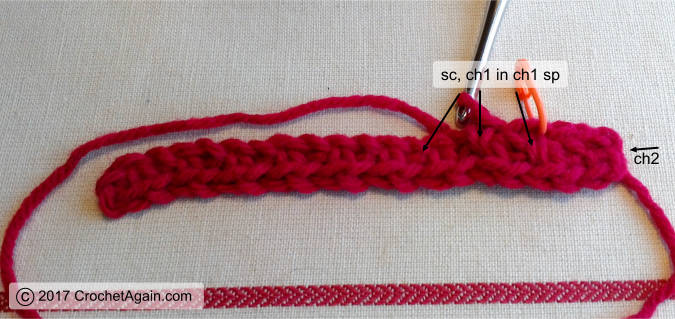
Round 1
Ch1
Sc, ch1 in the next ch1 space (place a stitch marker in this first sc).
Sc, ch1 in each ch1 space up to the ch2 loop on the end.
In the chain 2 loop – sc, ch2, sc, ch2, sc, ch1. 2 ch2 corners made
Sc, ch1 in the next st, repeat across up to next ch 2 loop.
In the ch2 loop, sc, ch2, sc, ch2, sc, ch1. 2 corners made.
Slpst to the top of the first sc of this round (you placed a stitch marker in it. Be watchful to skip over the slpst, ch1 from the previous round.
Do not end off.

Round 2
Ch1
Sc, ch1 in the first ch1 sp. Place you stitch marker in this first stitch.
Sc, ch1 in each ch1 sp.
Continue around, in each corner ch2 space, sc, ch2, sc, ch1.
When you approach the beginning of the round, sc, ch1 in the last ch1 sp (it is after the last sc of the previous round).
Skip the slpst and ch1 from the beginning of the round and slpst to the top of the first sc.
Do not end off.

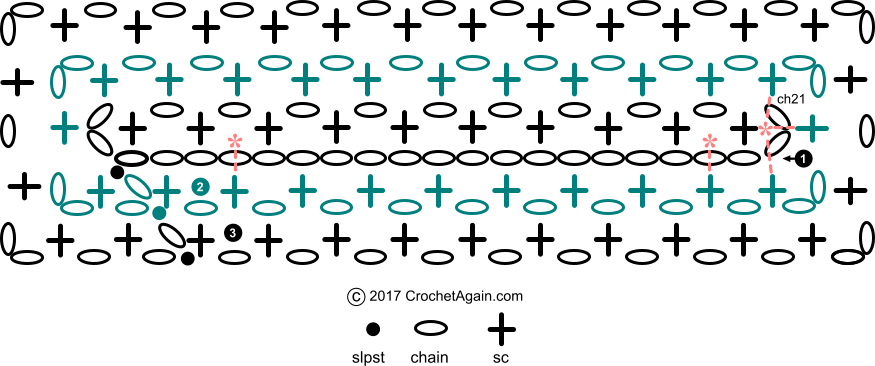
Diagram of foundation with 2 rounds
Rounds 3 – 20
Continue as in Round 2, moving your stitch marker to the first stitch of each round.
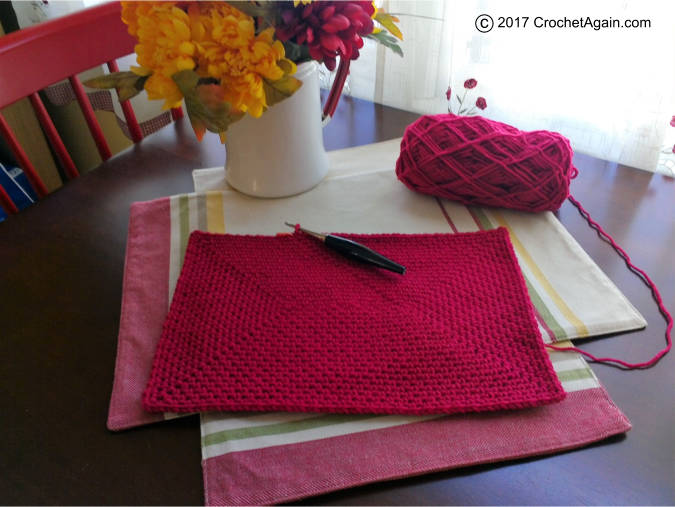
The base measures approximately 9 3/4″ x 14 1/4″. You can do fewer rounds to adjust the size to your liking.
Sides
Round 21
Continue as before. When you reach each corner, you will sc, ch1 in the ch2 spaces. That is the only change, continue around as in the previous rounds.

This diagram adds in the start of the sides
Round 22 – 30
The remaining rounds will not have ch2 corner spaces, so you continue with sc, ch1 all the way around.
Slpst to the top of the first sc in each round (move the stitch marker).
At the end of Round 30, slpst to the top of the first stitch and end off.
Rounds 31 – 74
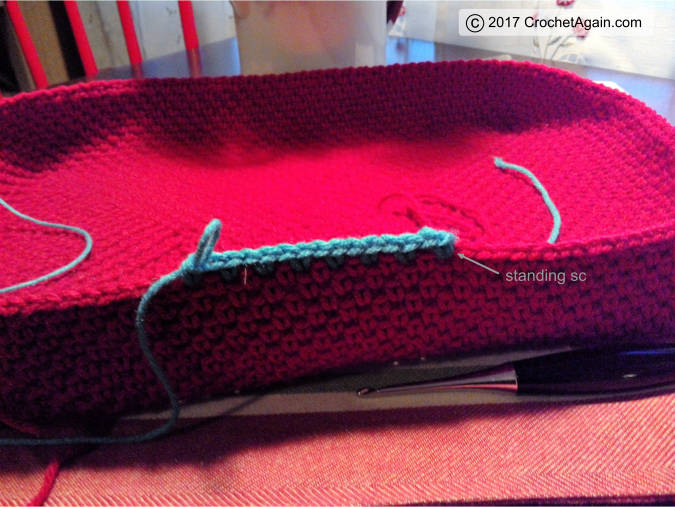
Color changes! I changed color each round by attaching the new color with a standing stitch. You can also attach with a slpst,ch1, sc in the same sp or another method that you prefer.
1 round of each color, done in the same stitch as the previous rounds, go around, slpst to the top of the first stitch, end off.
I attached each new color in a different place on the bag so they didn’t line up. I list the colors I used for my stripes at the end.
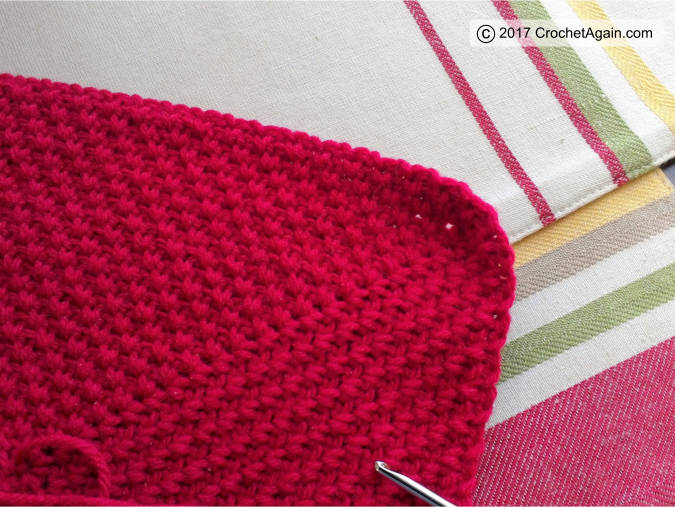
Things are starting to take shape!

The Edging
Round 75 – 76
75 – 1 round with same stitch as all the others in the edging color (Cherry). Slpst to top of 1st st, do not end off.
76 – Ch1, 2sc in the next ch1 sp and in each ch1 sp around. Slpst to top of 1st sc. End off.
Handles
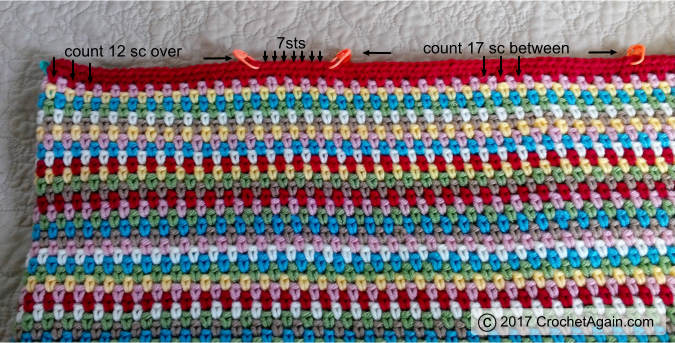
I carefully folded the bottom up, neatly and centered and marked the edges with a stitch marker. Counted sc from the edge to make sure they were the same distance and had the same space between the handles. Place stitch markers on either side of 7 sts of the edge for each handle.
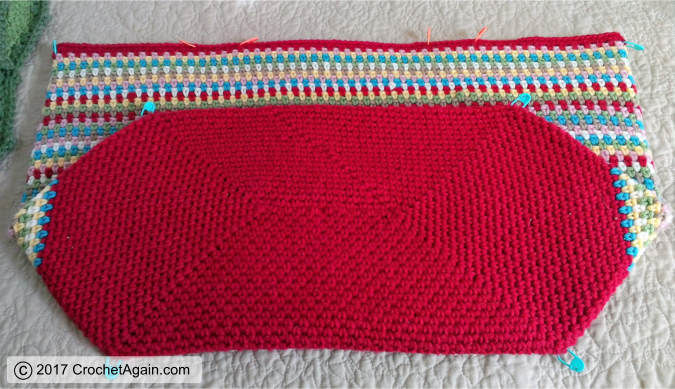
Place your handles on both sides of the tote, checking that it is all even.
Row 1
Attach Aqua with a standing sc where you want to start your handle (or slpst, ch1, sc in same space as slpst).
Sc in next 6 stitches.
Row 2
Ch1, turn
Sc in 1st st, ch1.
(Skip a st, sc, ch1 in next st) 3 times.
Row 3
Turn
Sc in 1st and 2nd sts
(Ch1, skip a st, sc in next) 2 times
Sc in last st
Row 4 – 34
Repeat rows 2 and 3
End off, leaving enough yarn to sew 2 handles together and weave in.
Make 4 handles. Sew 2 on the same side of your tote together. Repeat with the other 2
The stripes
It is so much fun to play with stripes! If you want to duplicate the stripes I used, here is the order.
- Aqua
- Yellow
- Cream
- Fern
- Yellow
- Taupe
- Rose
- Cream
- Cherry
- Taupe
- Cream
- Aqua
- Rose
- Fern
- Aqua
- Taupe
- Fern
- Cream
- Cherry
- Rose
- Yellow
- Fern
- Aqua
- Cream
- Rose
- Taupe
- Aqua
- Fern
- Cream
- Cherry
- Cream
- Taupe
- Yellow
- Cherry
- Taupe
- Aqua
- Rose
- Yellow
- Taupe
- Cream
- Fern
- Aqua –
- Yellow
- Rose
- Cherry (1st round of edging and edging)

This is beautiful!!
LikeLike
Thank you, I really like it too!
LikeLike
Me encanta la bolsa tanto para bolsa de playa o de labores
LikeLike
that is so lovely!!!!
LikeLike
Just gorgeous! Thank you for this pattern!! 🙂
LikeLike
Hi, I’m new to your blog, found you whilst blog hopping! Your bag is gorgeous, I love the colours 🙂
Jillxo
LikeLike
Oh my gosh! I love it! Super duper cute.
LikeLiked by 1 person