
Here is a quick tutorial on how I am going about my Log Cabin squares, it is just a variation of a typical granny square (please let me know if you see any mistakes in the directions)…
Update (and update corrected): post with pics of the finished Gray Area Log Cabin Blanket which shows what I did with the border, for an estimate of the yarn used, go to the Log Cabin Blanket post.
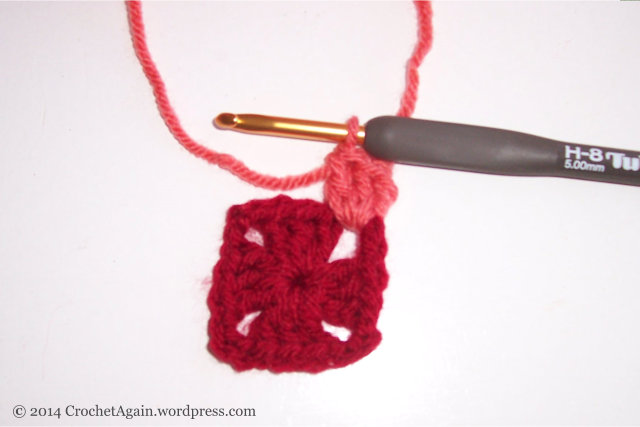
Start with a sliding ring, and make a 1 round granny square. To do that, in the sliding ring you ch3 (counts as 1st dc) 2dc in the ring, [ch3, 3dc in the ring]3 times.

End with a ch3, tighten the loop, slpst into the top of the first ch3. End off.
Now, instead of going all the way around, I am going to make rows along 1 side at a time.
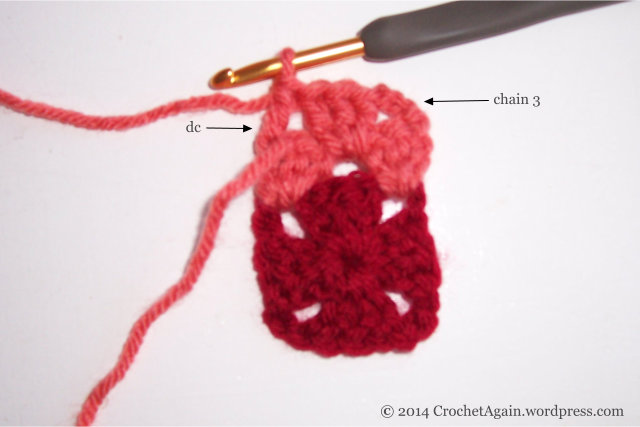
Attach a new color with a standing stitch (or slpst and ch3) into any ch3 space. 2dc in the same sp. Make sure the center square has the right side facing up, now and each time you start a new color.
3dc in the next ch3 sp, ch3 and turn. 3dc in the space between the clusters of 3dc of the previous row. Dc in the top of the standing stitch of the first row. End off. That gives you 2 granny stitch rows on one side of the beginning square.
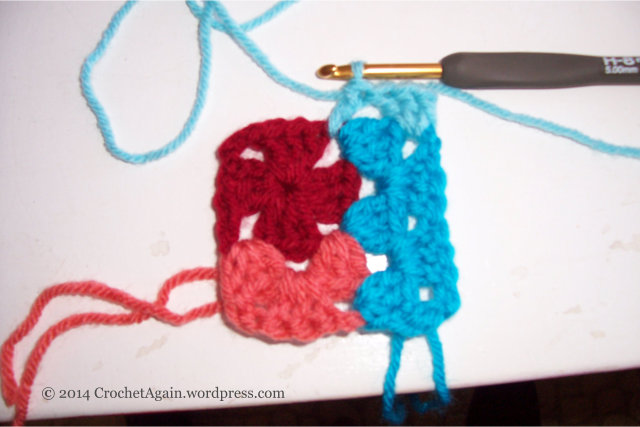
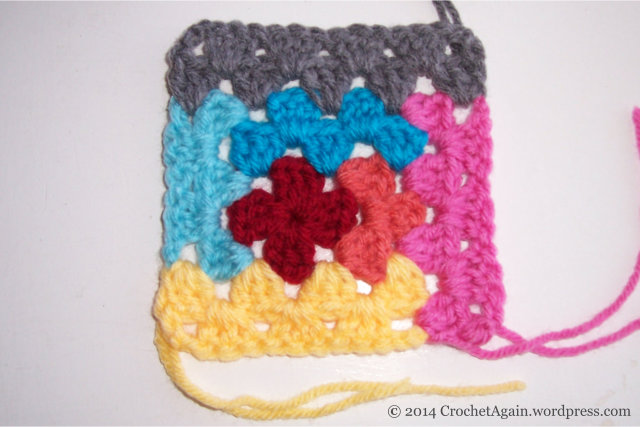
Making sure you have the center square right side up, attach a new color to the ch3 space of the color you just worked with, 2dc in same sp. Make 3dc clusters in the next ch 3 space and across to the ch3 corner sp on the end. Ch3 and turn, making 3dc clusters in between the 3dc clusters of the previous row. Dc in the top of the first stitch (or top of your ch3) and end off.

Turn your square right side up again, and attach yet another color in the corner ch3 space. 2 dc in the same space and continue on across again making 3dc in-between each 3dc cluster and in the ch3 space at the end. Ch3 and turn, do a second row in this color ending with a dc in the top of the first st, end off.
That gives you the idea, you are doing 2 rows on each side of the original square. To help prevent the tedious weaving in of all of those ends all at once, I weave them in every 3 colors.
For this square I am keeping the darker colors along 2 sides, and lighter colors along the other 2 sides (other squares I am making in just random colors). I make sure the center square is right side up each time I attach a new color. The new color always starts in the corner of the color I just finished.
Time to weave in more ends and continue on….
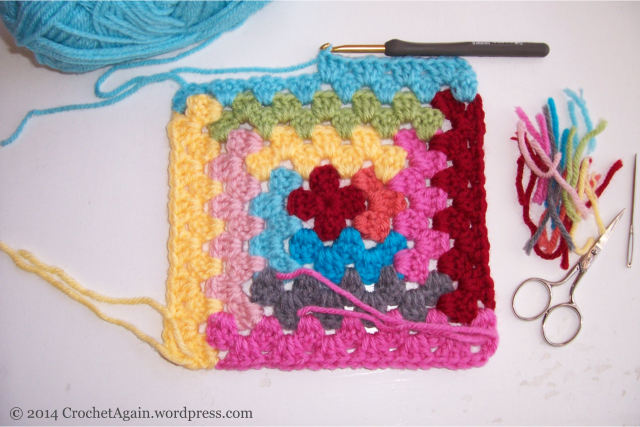
Almost done, I am doing 3 two row stripes on each side. This image shows the back side. It feels good to only have a few ends left to weave at the end!
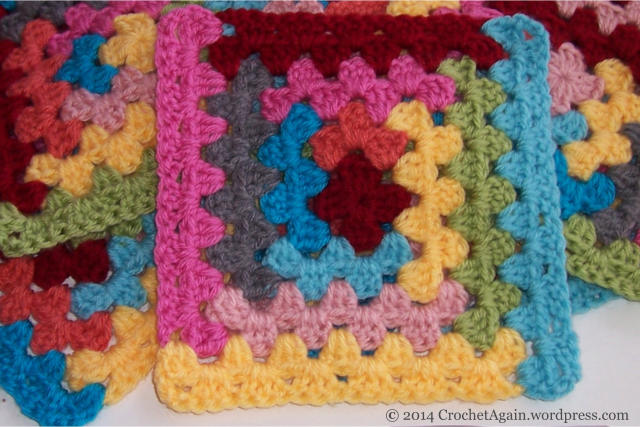
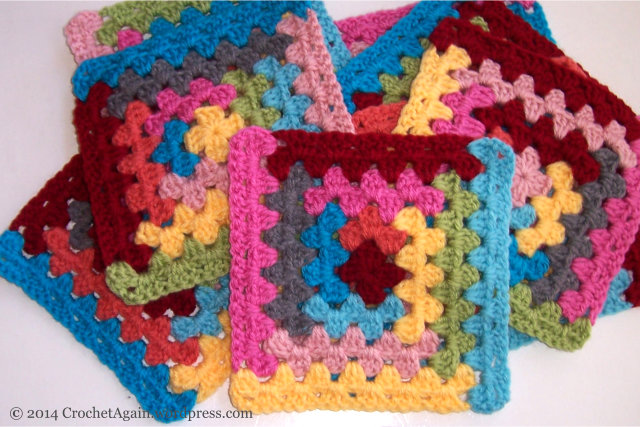
The finished square measures about 7 1/4 inches across. They go pretty quick, I have 10 done. I think I will have 5 rows of 4 each for the blanket. Planning on several rows of gray around each, and I think I know what I want to do for the border, will have to see if it works out the way I hope!
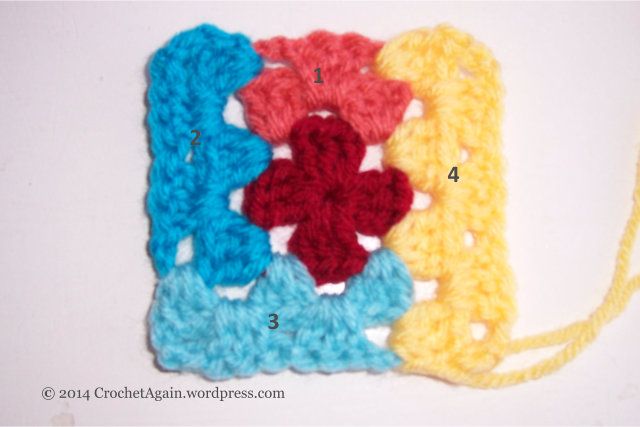
Here is a photo with each color numbered, in case being able to see what order I did it in makes it clearer….


That is a fun idea!
LikeLike
gorgeous colour combos!
LikeLike
This is really cool and a great spin on the traditional granny square. It looks a bit like lego (but in a good way!) Think I might try making these!
LikeLike
I always think granny squares look like puzzle pieces. Lego’s are a good one too.
LikeLike
How cool. I’ve pinned this thanks for sharing
LikeLike
Like this a lot, and the colors are great also.
LikeLike
Thank you this just proved that grannies can be started with magic loop.
LikeLike
Did that need proving? I didn’t know there was a question!
LikeLiked by 1 person
Well there was and there wasn’t i just didn’t know if it would ruin it or not. 🙂
LikeLike
This is awesome and thanks for sharing. I like your standing stitch and will have to try it as I have a heck of a time starting a new color with a slip stitch in a space (like is done with a granny square) – slip stitch in a stitch isn’t a problem. Any suggestions (other than standing stitch) on slip stitch in a space? Thanks for sharing all your wonderful tips and patterns!
LikeLike
Often I prefer a sc instead of a slip stitch. So I would do a sc, ch2, (instead of slpst, ch3).
What is it that is different about doing a slpst in a space instead of in a stitch that you don’t like?
LikeLike
I love this Log Cabin Granny Square Afghan but can not locate how much yarn to buy. Where is that info located.
Thank you
LikeLike
The amount of yarn used was mentioned in this post: https://crochetagain.com/2014/01/04/log-cabin-blanket/
LikeLike
Wow this is awesome thanks for sharing
LikeLike
Thanks for sharing! This gives a total new, fresh look for granny’s. I will definitely try this at some stage!
LikeLike
très très sympa j’ aime beaucoup l’ idée une belle façon de faire bravo pour le tuto a bientôt
LikeLike
This pattern and step by step solved all my problems I had with the one I tried to do before mine worked out fine but the one I invented on my own is a lot harder will not do that one again love yours and I got the same results just a lot easier to do and the three color weave in the ends excellent idea again thank you so much keep the patterns coming in the same fashion with the step by step even for someone who has been crocheting for 49 years like myself. It can be a big help.
LikeLike
I like things with a twist. I like granny squares. So i LOVE this pattern. Thank you for sharing this. Love K@
LikeLiked by 1 person
Fun pattern! I love that it looks like jumbo sized ric-rac.
LikeLiked by 1 person
I’ve always loved the Log Cabin quilt pattern and love this version. What a great way to use yarn shorts!
LikeLike
I’m working on my second log cabin granny afghan for a loved one. thanks for the visual help.
LikeLike
Wow !! Thanks for sharing and bravo 🙂 I have a self striping baby alpaga yarn .. please what is the method to follow to crochet this Log Cabin Granny Square ??? I really like this new revisited square :). Thanks in advance from NZ
LikeLiked by 1 person
Yes, you could do this with the revisited, mitered square version. I don’t have directions on how, but the changes were minor so should be easy enough to adapt.
LikeLike
Why don’t you crochet over the ends as you go? There is no need to weave in any ends…
LikeLike
I have done that in the past. Weaving in the ends is less visible and more secure than crocheting over the ends as you go (assuming you change directions of the weave). I will crochet over a few stitches to keep it secure until I weave it in, but that is temporary.
LikeLike
Thank you so very much for sharing your patterns. I love the colors and love the log cabin with the gray¡! Thanks again for sharing, your blankets are gorgeous¡!
I am a crochet novice but I don’t want my blankets to look like a novice made them. Your instructions seem very easy to follow. I will let you know what I think after project is finished.
LikeLike
This is so unusual but in a good way! A pretty good way to use up scrap yarn! And I love your color scheme! I’m gonna make a few of these along with other “same size” squares and make a blanket. I think this will definitely make it look so much better!
LikeLiked by 1 person
So many cute patterns
LikeLike