Mitered Granny Square

Updates:

1/21/17: A new version that is done with ch2 corners and a ch1 between the 3dc clusters, diagram for Mitered Granny Square 2.1.

Diagram for Modern Mitered Granny Square.

Helpful links:

Link to Sliding ring tutorial, if you would like to start your squares the way I do.
Link to Join As You Go tutorial, if you would like to check out how I like to join granny squares.

These are the directions for the blanket I first showed in the Crochet in Progress post, here is a better photo (the colors look a bit washed out, the sun was bright):

And a closer look, remember it is posed on a chair, instead of lying flat so the squares look less than square. Continue reading “Mitered Granny Square”

Advertisement

Granny Bunting

I got it in my head to make some crochet bunting.  I tried quite a few different crochet triangles, there is a nice assortment of them on the interwebs.  But none of them were just right for me.  I wanted them to be a bit taller than wide, and granny was a must.  Some scallop edge would be nice too.  I think I am happy with these : )

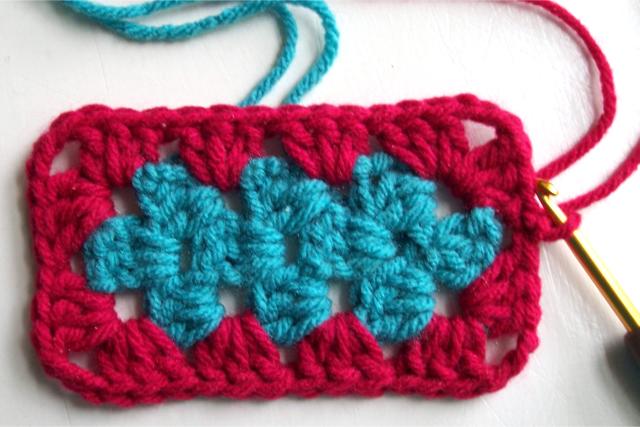
Yes, yes, I do think I like them quite a bit.  The colors in the photo aren’t quite right, they are red, white and aqua.

Here are the directions on how I made them, using the red, white and blue one as the example.

I used worsted weight acrylic yarn and a 4.5 mm hook.

Round 1

Start with red, make a magic circle, draw up a loop and ch3 (counts as first dc here and everywhere : )
In the circle, 2dc, ch3
4dc, ch3
4dc, ch3, slpst to top of beginning ch3.  End off.  (1 group of 3dc, 2 groups of 4dc with 3 ch3 “corners” in between each.  The 3dc side of the triangle will be the top)

Round 2

Attach white with a dc or a slpst and ch3 in the corner that is to the right of the group of 3dc. 2dc in same space.
3dc, ch3, 4dc in next corner ch3 space.
4dc, ch3, 4dc in next corner ch3 space.
In the starting ch 3 corner, 4dc, ch3.  Slpst to top of beginning stitch or ch3.  End off.

Round 3

Attach aqua to the same ch3 corner that you ended with.  2dc in same space.
3dc in the space between the 3dc group of the previous round.
3dc, ch3, 4dc in the next ch3 corner space.
4dc in the next space between.
4dc, ch3, 4dc in the next corner space.
4dc in the next space between.
In the starting ch3 corner, 4dc, ch3.  Slpst to beginning.  Do not end off.

Round 4

Ch3.
3dc in each of the next 2 spaces between.
In the corner ch3 space, 3dc, ch3, 5dc.
In between the 2nd and 3rd dc of the next 4dc, sc.
5dc in next space between.
Sc in between 2nd and 3rd dc.
5dc in between again.
Sc between 2nd and 3rd again.
In the corner ch3 space, 9dc.
Sc in between the 2nd and 3rd dc.
Carry on like that, 5dc in between and sc between the 2nd and 3rd stitch.
In the beginning corner, 5dc, ch3, 2dc.  Slpst to top of starting ch3.  End off.

Here is a diagram to help out.

To Join the Triangles

With white, make a slip knot and ch8.  Slptst to beginning.
Ch8 again.
3dc in right hand corner ch3 space of your first triangle.
ch12
3dc in the opposite ch3 corner space
ch6
3dc in the corner space of your next triangle.
ch12
3dc in opposite corner.
End with ch16, slpst in 8th ch from hook, end off.

Another diagram to help out, hope it is big enough to see clearly….

Love to hear about and see any that you make!

Granny Square Table Topper

Sunny Table Topper

My table topper is almost finished, just need to do all the weaving in (I wish that was as easy as hiding them underneath for the photo : )  I really love how it came out.  The colors are so cheerful, a bright spot for morning coffee.

crochet granny square table topper

Take a closer look…

Granny Square Table Topper

I really like the simple, softly pointed edge.  Come in and look a little closer…

Pointed crochet edging

If you know how to do corners on granny squares, then you already know how to do the edging!  In the space between 3 dc, do the 3dc, ch3, 3dc that you would do for a corner.  Sc inbetween the next 3dc space.  And so on.  You need an odd number of 3dc spaces to have it work out right.  In the corner spaces, I did 4dc, ch3, 4dc to make them a bit bigger.

You can see some of the squares before the edging was added in this post.

Crochet In Progress

These are pictures of a couple of things I am working on right now.

Some granny squares in my latest favorite colors…

These are being joined together to make a table topper for the very table I took the pictures on. I don’t know what I am going to do for the border yet, maybe a shell/scallop edge.

And my other big project, a mitered crochet blanket.  I have quite a way still to go on this, but I really like how it is coming out.  A bit blurry photo, but it gives you a straight on view.  I plan on writing the pattern for this granny square in the not too distant future.

update

the directions are here

crochet granny rectangle

Granny Rectangle Tutorial

crochet granny rectangle

Update

Please see my newer post A Better Granny Rectangle.  It’s a different way of starting a rectangle, and obviously I think it is better, depending on what you want : )

I have been unsatisfied with how I was doing granny rectangles.  I didn’t like how the center start didn’t match the rest of the fabric, where the clusters align instead of alternating and the starting chain is obvious.  I thought of a different approach, I think I like how it turned out.  This is my first tutorial, I hope it makes sense.  if something isn’t clear please leave a comment and I’ll see if I can make it make sense : )

To Start

Make a sliding ring.  Draw up a loop and ch 6(counts as dc, ch3), 3dc, ch3, dc in the ring.

Croceht Granny Rectangle start

Tighten up the ring and chain 3.Tighten the ring and chain 3

Rows

Turn, and work as a row on the bottom side with 2dc in the first ch space and 3dc in the next ch3 space.  Ch3 and turn.

Granny Rectangle Row 2

Make 3dc in the space between the 2 groups of 3dc of the previous row, and 1dc in the top of the ch3 of the previous row.  Ch 3 and turn.

Row 3 of the crochet granny rectangle

Continue working as rows, alternating with ch3, 3dc in next space, dc in the top of the ch3 of the previous row for 1 row and ch3, 2dc in the ch space, 3dc in the next ch space for the next row.  Make however many rows you want, but you want to end with a row that has a center 3dc and a ch3/dc at each end.

Granny Rectangle Rows

I am going to change colors, so I am ending with a ch3 instead of a dc.  That gives a consistent ch3 for each “corner” of my rectangle.  If I was going to keep on with the same color, I would just do a dc, ch 3 for the round instead.

Granny Rectangle ending with chain 3

Slip stitch to the top of the ch3 of the previous row.  End off.  You now have a narrow rectangle of rows, with corner spaces.

Granny Rectangle End with Slip Stitch

Rounds

Attach a new color in a corner space with a dc (or slpst, ch3).  2dc, ch3, 3dc.

Granny Rectangle Attach new color

Continue around, doing 3dc along the side in the space between the 3dc’s of the rows and 3dc, ch3, 3dc in each corner space.

granny rectangle continue around

And there you have it, a crocheted granny rectangle.

Finished Crochet Granny Rectangle

Hexagon

GrannyHexagonI love Grandmother’s Flower Garden quilts. I would love to crochet one someday. Right now, I am crocheting a different pattern in blanket size, but that doesn’t stop the creative thinking and doing a little something else is a needed break. This is my version of crocheted hexagons, maybe I will make a runner.

Granny Hexagons

note: I prefer to use a slide ring to start my crochet, and often start new colors with whatever stitch is needed rather than a slip stitch and chain. Please use whichever methods you prefer instead.

Round 1

  • Make a slide ring, in the ring:
  • Ch 3 (counts as first dc), 2 dc, ch 3
  • 3 dc, ch 3
  • continue {3 dc, ch 3} until you have a total of 6 ch 3 spaces and 6 3dc clusters
  • slpst in the top of the first ch 3

Round 2

  • Attach second color with a ch 3 or dc in any ch3 space
  • 2dc, ch3, 3dc
  • continue on {3dc, ch 3, 3dc} in each ch 3 space
  • slpst to top of first stitch or in top ch of the ch3

Round 3

  • Attach in any ch3 space with dc or ch3
  • dc, ch1, 2dc
  • 3dc in next space between
  • {2dc, ch1, 2c} in next ch3 space
  • continue around, with 3dc in each space between the corners, and 2dc, ch1, 2dc in each corner. Slpst to top of beginning stitch, end off.
click for larger image