

Some have asked for directions on how to do a sliding loop, perhaps because I keep mentioning starting with one : ) There is more than one way to do these. I have tried several ways from various directions on the web and in books, and this is the one I like the best and find easiest to do. That’s just me, you may find a different way easier.
Here we go….
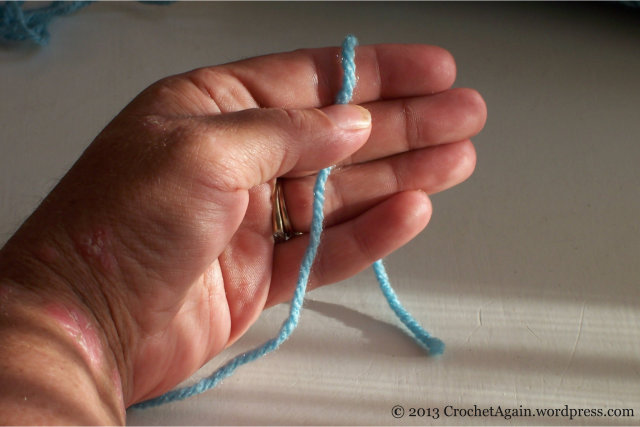
Drape the yarn over your hand, with the tail end in the back. You need quite a bit of tail, as you are going to bring it around your hand.
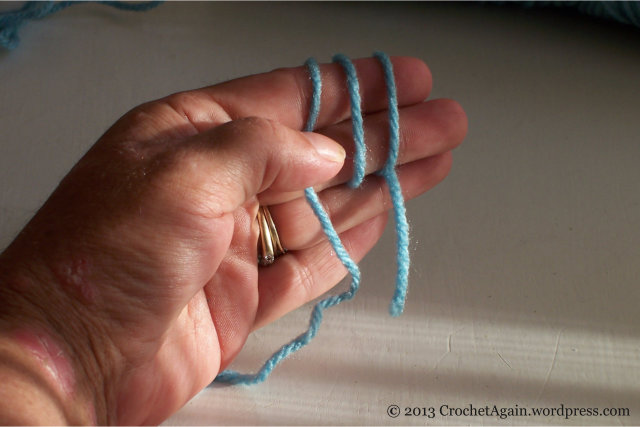
Wrap the yarn around two fingers, bringing it up from underneath your hand towards you and then over the top (away from you). You want two loops over your two fingers (you can also do it around 1 finger, maybe easier if you don’t need to do many stitches in the loop. Or wrap around 3 fingers if you need a larger loop for many stitches). They should be a bit loose. Hold the working end of the yarn with your thumb.
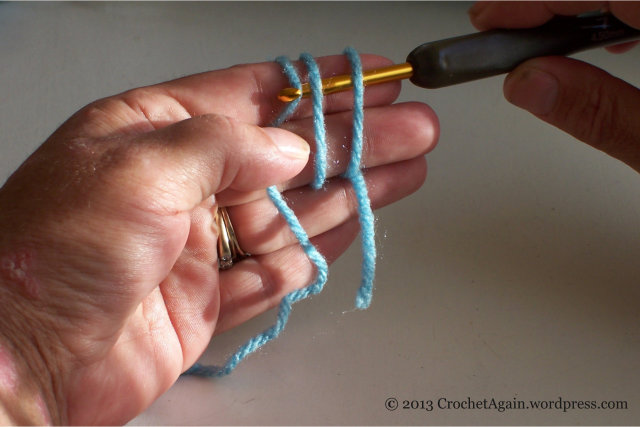
Put your hook under both loops and pull the working end of the yarn under the loops.

Yarn over and pull through, making a chain.

I am going to do double crochet for this example…

so I chained 3 more (this counts as the first double crochet).
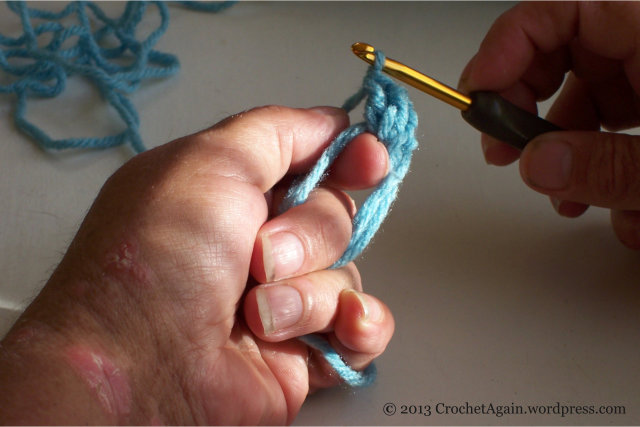
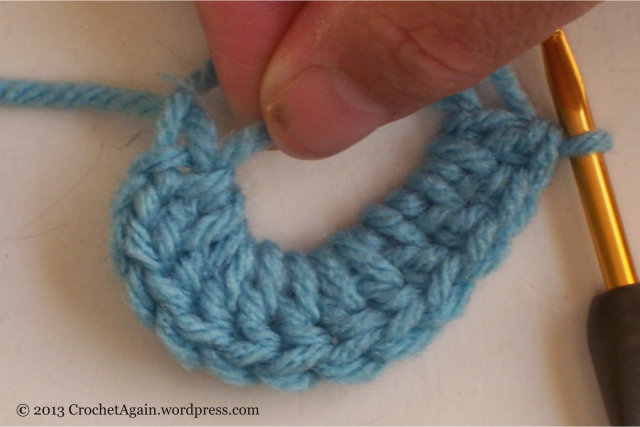
And now make your double crochets into the ring. I find it easiest to hold it as you see in the photo, at least until I have done a few stitches into the loop. That could just be me, you may have to experiment and find what works for you. I remember it feeling pretty awkward at first.
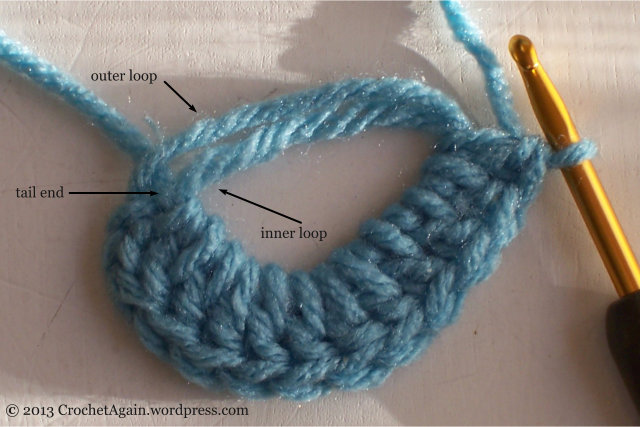
Once you have all your stitches in, you need to look at all the parts to figure out which loop to pull on which end, to close the ring.
You want to pull the inner most loop on the beginning side, where your stitches began.

I have pulled the inner loop so I now have one large loop. Now I will need to pull the tail end so that this loop pulls through.

Here it is with the tail end pulled through. I prefer to tighten only so much that the stitches meet nicely, so I still have a small hole in the center. I only need to slip stitch to the top of the ch2 (be sure to slpst through 2 loops of the chain) and it is done.

So now I no longer have to feel guilty when I say start with a sliding loop or magic ring, knowing that some may not know how. I hope this is as clear to everyone as it seems to be to me!

muchas gracias por tu generosidad, no sabía cómo hacerlo¡¡¡¡ muchas gracias, saludos¡¡¡¡¡Tere
LikeLike
Thank you for sharing!
LikeLike
do you just snip the tail of the magic loop or do you weave it in somehow to finish it?
LikeLike
You weave the end in.
LikeLike
Thank you so much for the illustration. I wouldn’t be able to make a magic ring otherwise bc I am a visual learner. Again, thank you.
LikeLike
Thank you! You made this very accessible and easy to understand! 🙂
LikeLike
Thank you for a clear demonstratio…..
LikeLike
I am left handed but your photos and instructions made it easy for me to do it. Thank you.
LikeLiked by 1 person
Thank you so much it’s easy to do when I see you doing it. Rita
LikeLike
These instructions were phenomenal. Thank you more than you know for the visuals.
LikeLike
I’ve done a thing called a magic ring. Yours looks better so I’ll give it a go. Thank you.
LikeLike
Your photos are good. No fiddling about and easy to follow. I’m a middling crocheter (77) so I think I’ll get along OK with you. I’m dc_cats because I have 7 cats.
LikeLiked by 1 person